Showing posts with label Home Decor. Show all posts

Tuesday, February 11, 2014

Happy Valentine's Day with Happy Tape

So, Washi Tape or Happy Tape is becoming B.I.G. I did several Valentine's Day cards and other items with Washi. Here are some Valentines I made for my children. I also made 15 more just like these for my preschool class.
 
 
 Here is what my current stash of Happy Tape looks like.
 
 Here is a Valentine's day letter from my children to their grandma. Happy Tape makes this envelope pop with color.
 Here is the close-up of the back of the envelope.

Monday, January 20, 2014

Valentine's Day

Valentine's Day is right around the corner.
 I love to make homemade cards with the kids. They love the glue and the glitter and stickers and time with mom. This year, I have some new toy to play with. If you read my last post,
 you know that I received a sewing machine for Christmas. So, on to the sewing projects.
 I have yet to sew on real cloth, I just keep sewing on my paper projects.

 Here I cut hearts with my Cricut. I cut many of the same size and took two and started to sew them together. When I was about 3/4 of the way around the heart, I stuffed in a tissue with scissors to really work it in there. Then I finished sewing the heart closed.


Then I added smaller hearts that were also cut on the Cricut.
 
Then I added embellishments.
The kids will add the sentiments.
Super easy!
I could become addicted to this sewing on paper thing.
 
Come visit me on Facebook


Friday, December 6, 2013

JOY

 
Finding Joy
 
This year at the start of the Christmas season my family and I decided to make
the season JOYful. Last year a friend shared with us the true meaning
of JOY -
It is putting Jesus 1st, Others 2nd, and Yourself last.
Now I know this is hard and we shouldn't always put ourselves last.
This was just a nice reminder to not think about ourselves this Christmas
but to try and make others happy.
(we are having fun planning Secret Santa stuff)
 
I purchased three 5x7 frames
 
 
Yes, that says $1.50 - I went to the dollar store!


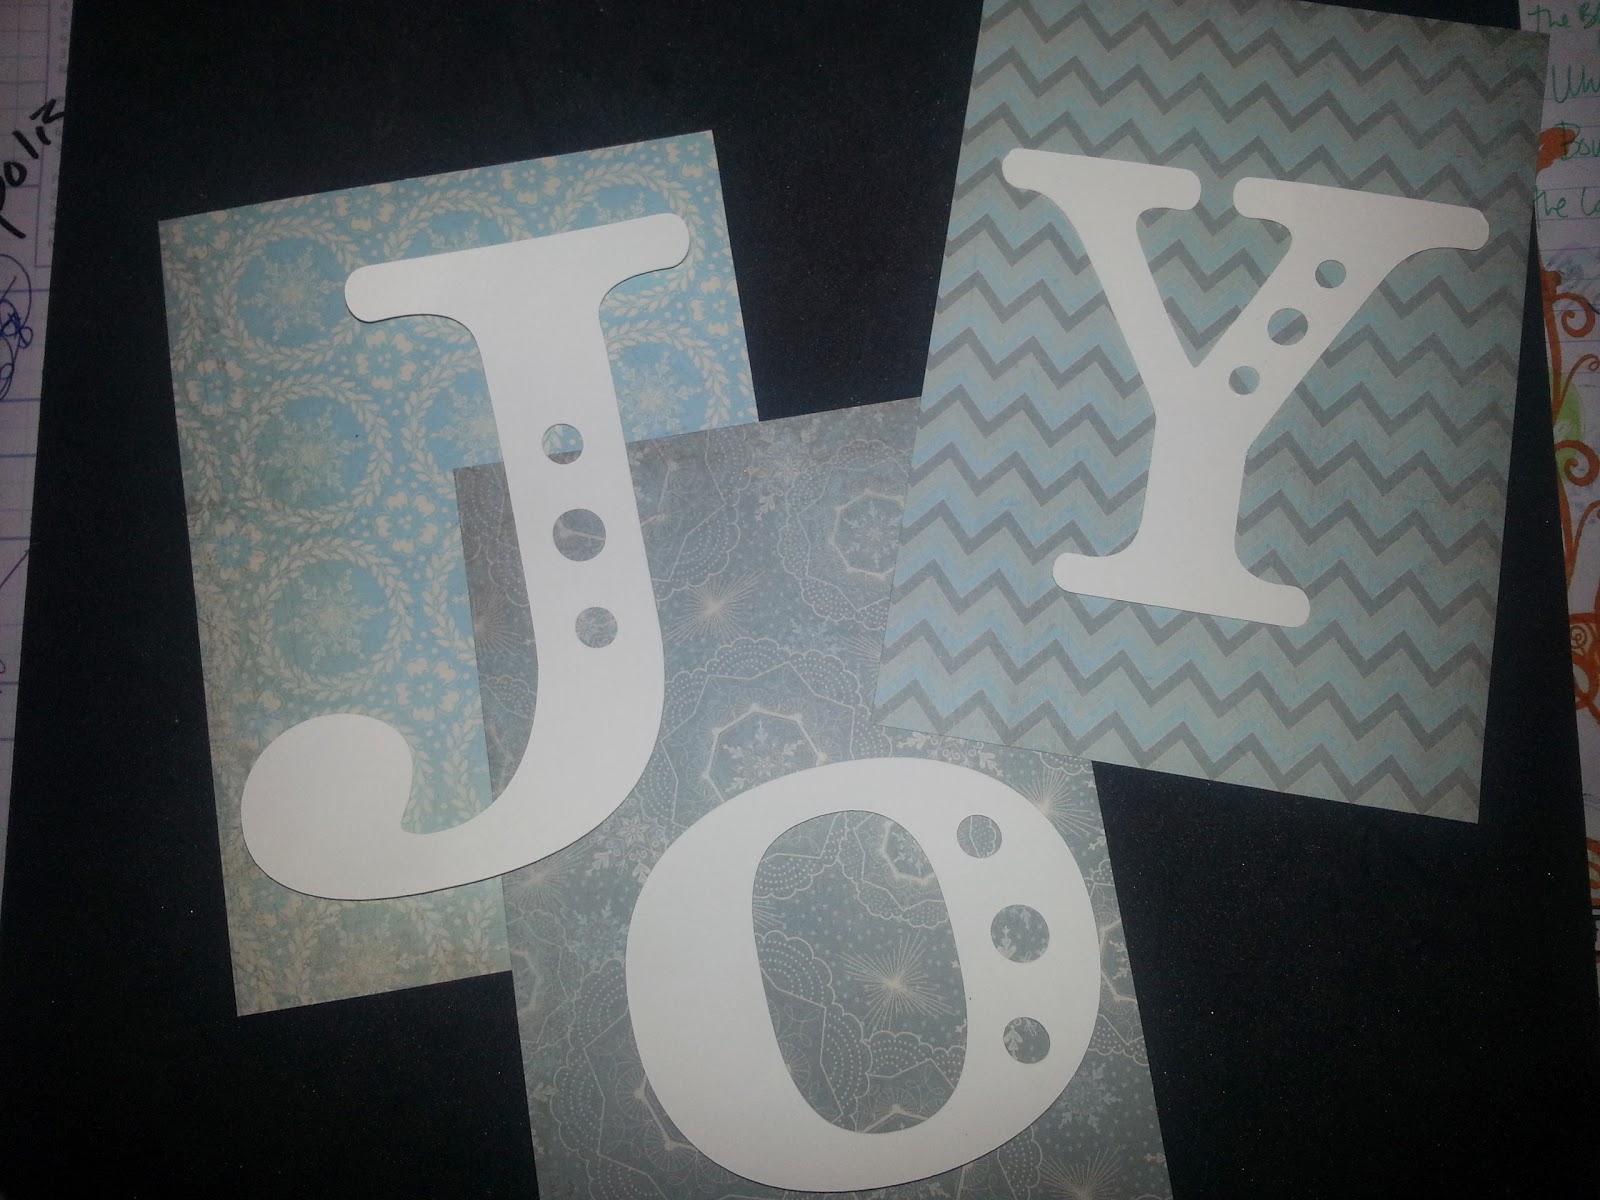
I picked out 3 different papers that I thought worked well together and cut them to my frame size.
These are from the Frosted paper pack from Close To My Heart.
 
 I used my Cricut to cut out the J O Y.
I attached them to the background paper.
 
I put the letters in the frame and surrounded it with tiny plastic glittery snow flakes
and tinsel. 
 
Now my family is reminded of the
The Real Reason for The Season!
 
*The approximate cost of this total project was $7.50 but it looks like I spent much more!
Wishing you a JOYful Christmas season!

Thursday, October 11, 2012

Another Pumpkin Post!

I LOVE PUMPKINS! These are made using the Artiste Cricut Cartridge... I have to make these before Halloween!!!!!

Thursday, October 4, 2012

Your Own Festival Of Trees

If you have a CTMH autumn/winter Idea Book, then you have probably seen these super cute Christmas trees... (page 61)
 
These trees were super easy to make using the Cricut Artiste cartridge.
I added embellishments from the
Festive Velvet Rub-Ons,
Dimensional Elements In Color - Holiday,
 Cranberry Baker's Twine,
Hemp in Natural color,
 and a new FAVORITE of mine - Burlap Ribbon.
 
The great thing is, you can dress these cute little trees up as little
or as much and YOU want to...
Love the visual texture of the burlap!!!
 
I would suggest that you cricut cut these out in different sizes,
then decorate while flat,
then assemble - gluing the sides together, then the bottom.
 
Enjoy these festive trees...


Friday, September 21, 2012

I LOVE Pumpkins!

Ok, so I know this summer I admitted I was a hostaholic, but what I failed to mention,
was that I am also a pumpkinholic... I LOVE PUMPKINS!
 
Here is a simple paperback pumpkin I made.
Super cheap & super easy!
I asked my husband to make me a pumpkin template and he did!  You only need 1/2 the pumpkin shape because the pages fan out, thus making an entire pumpkin.  I put the template into the book like I would a bookmark and then cut around it.  I cut multiple pages as one time. When the entire book was cut, I broke up the spine and glues the front and back cover together. When this dried, I took my Autumn Terracotta CTMH ink and inked every page. I had my son, who loves sticks, to bring me some sticks from the woods near our house. I found one that fit well and put it through the middle of the pumpkin and finished with some ribbon.
Oh, how I love how this looks on my bookcase!
 
Here are some other pictures of pumpkin decor...
These were both put together by Camille N. for table centerpieces.
I just adore how pumpkins look on an autumn table.
 
Enjoy Fall!


Tuesday, September 18, 2012

Halloween Is Coming

I don't know why I decorate for Halloween so much. I don't like being scared or seeing scary things, but I am SO attracted to the color orange and all the different shapes of pumpkins and gourdes. So, when my friend said I could come over and use her Artiste Cricut cartridge I JUMPED all over that!

The new Autumn/Winter catalog from Close to my Heart has a great deal on this cartridge and some fun things that can be made... Here is what my friends and I did yesterday.


These are small caskets that can be filled with candy or other trinkets... I stamped the top of the casket while it was flat and then I assembles and added embellishments.
 
You can see the start of this Display Tray in an earlier post, but here is the jazzed up version. I used one of the small caskets - in the upper right, is the top of the casket and in the middle is the bottom of the casket (I put a skeleton inside). I also added the word spooky after I used black ink to age/texture the cardstock.
 
 
I accidentally made a large casket, but it turned out to be super neat, so I made a large skeleton to go inside.


So, I just want to thank Emily for letting me have access to your amazing cricut machine and Liz for helping fold all the caskets.
 

Saturday, September 15, 2012

Countdown To Christmas

This weekend I made these countdown to Christmas blocks.  It was easy and fun.  I took some ideas from the CTMH Christmas card class I am teaching and some I designed myself. The blocks are only $3.95 each, so this project comes in somewhere under $12.00 dollars (including tax, shipping and paper). I will be teaching a class in early November on how to make these, so I will soon be making a more step by step posting... 

Here are a few quick hints..
* make all block faces before attaching any...
* cube 1 (0,1,2,3,4,5)
* cube 2 (0,1,2,6,7,8)

Here are more pictures...


Friday, September 7, 2012

Home Decor

Close to my Heart has added some new home decor items...
I am in LOVE with the Display Tray!
This wooden display tray has 12 openings (3x4), already attached hangers and a black finish.
  
I simply took paper and cardstock from the Moonlight paper packet and cut them into 3x4" pieces.  I stamped some and left others plain. 


I am excited to change my home decor so easily and inexpensively for each holiday season.
 
If it has been a while since you've shopped at CTMH, prices on paper packs has DROPPED!
Paper packets are now $9.95
And the Display Tray is only $19.95
 

Where you can find me:designwithdeborah@gmail.com
designwithdeborah.ctmh.com
designwithdeborah.blogspot.com